
Installing plumbing in your new home can be a complicated and tedious process, but there are certain things you should always keep in mind when starting the installation process.
This article has a list of things that you should expect to happen during the installation so that your project will run as smoothly as possible.
What is plumbing rough-in?
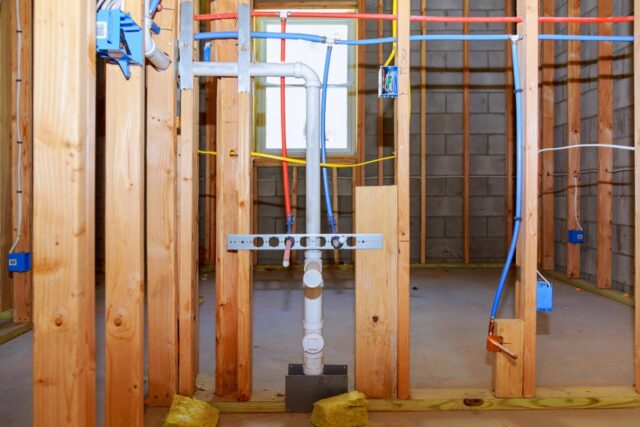
Rough-in plumbing is the process of installing plumbing in a new home or renovation project before any fixtures, pipes, or lines are actually installed. This allows the contractor to plan and ensure that all connections are correct and that all materials are installed properly.
It is often performed by a professional plumber, but with the right tools and knowledge, anyone can do it.
Different types
When installing plumbing in a new home, there are a few things to keep in mind. One of the most important is to make sure all the necessary connections and waterlines are installed before proceeding with any other work. This includes installing ventilation and sewer systems. Plumbers in Knoxville offer a variety of kitchen plumbing services and solutions using the best products available right now. Before deciding to install plumbing in your new home, there are a number of things you should think about.
Here are some of the different types of these rough-ins:
Installing Vents
Vents are necessary for proper ventilation in your home. They allow warm air to escape and cold air to enter. Installing a vent in your roof is a good way to improve airflow in your home. When selecting a vent, make sure it is compatible with the roofing material you are using.
Sewers
A sewer line connects your septic tank or cesspool to your home’s municipal wastewater system. You should consult with an experienced professional when installing a sewer line. The wrong size or type of sewer line can cause serious problems for your home’s plumbing system.
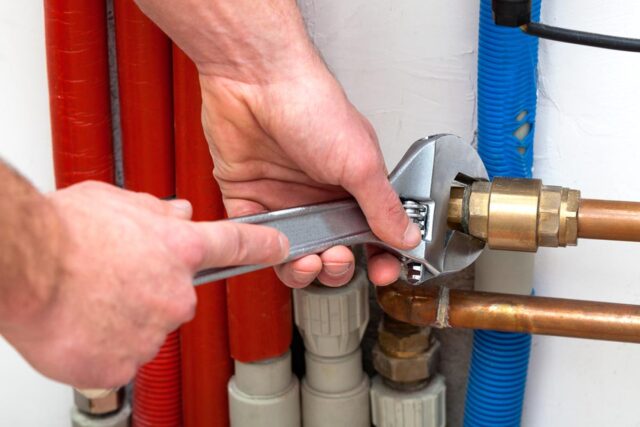
Installing Connections
Connection types include tub/shower connections, waterlines, and gas lines. Tub/shower connections are made by threading the showerhead tubing through the existing bathtub drain opening. Waterlines run from kitchen faucets to dishwashers or other appliances in the laundry room. Gas lines connect your appliances to the main gas supply in your home.
When installing any type of plumbing rough-in, be sure to use the proper tools and techniques. Use a level when drilling holes; make sure all corners are square before taping off areas that won’t be used.
What are the Benefits?
Here are some of the benefits of having well-done plumbing:
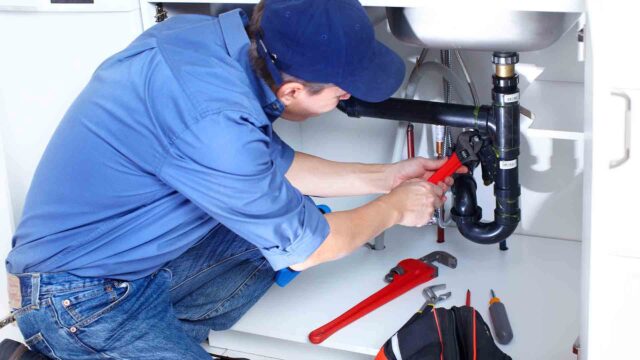
Your Home will be Ready for Plumbing Fixtures and Sinks
Well-done plumbing will ensure that all your plumbing fixtures and sinks are ready to go when you move in. This means less time spent trying to figure out where things should go, and more time spent enjoying your new home.
Your Home Will be More Secure
Plumbers are experts at installing pipes safely, so your home will be more secure than if the installation were done by someone who wasn’t familiar with the process. In addition, any mistakes made won’t cause major problems down the road.
Your Home Will Look nicer
Plumbing work isn’t cheap, but it’s worth it to have a home that looks professional from the start. A well-done rough-in will save you time and money down the road, and it will look great too!
Do it Yourself
If you’re looking to install plumbing in your new home, plumbing rough-in is the process of getting all of the pipes and fittings ready before installing them. Here’s what you need to know:
The Preparation Steps
- Be familiar with your home’s plumbing fixtures and how they work. This includes reading your homeowner’s manual.
- Plan the layout of the area before beginning work. Include a space for the water supply, waste disposal, electrical wiring, and gas lines. Make sure to account for future alterations or additions to the home.
- Clean and sanitize all surfaces that will come in contact with raw sewage, wastewater, or water droplets during plumbing work. Use a suitable disinfectant such as bleach or a chlorinated water rinse solution. Wear clean gloves and protective equipment including face shields, overalls, and boots if necessary.
- Remove any loose objects that could fall into the piping while workers are working above them or while the system is running. Secure items that must remain during construction with bungee cords or wire ties.
- Mark the location of all pipes and other fixtures with painter’s tape or pencil marks so that they can easily be located later on when everything has been completed. Putty between pipe joints can be used to fill small gaps but should not be used if there is a possibility of water leaking through the joint – use silicone instead.
The Tools You Will Need
Before beginning your plumbing, you will need the following supplies:
- Tape measure
- Level
- Circular saw
- Miter saw
- Pipe cutter
- Hole saws (1/2″, 3/4″, 1″)
- Cordless drill with bits suitable for metal pipe (3/8″ or 1/2″)
- Saw horses and a workbench
- Cement for outdoor concrete work (optional)
- Ruler or a straight edge
- Chisel and hammer (for cutting plastic pipes)

Installation Process
Decide where you want the pipes to go. Plumbing is done in sections, so make sure you have an idea of where each section will go before starting. You can use a plan or pencil and paper to sketch out your layout.
Mark the location of the pipe in the wall using a level. Make sure the pipe is centered in the hole and that the hole is large enough for the pipe’s diameter (usually 1/2 inch).
Drill holes through both the wall and the pipe using a drill bit that’s slightly smaller than the pipe’s diameter (1/4 inch or 6mm). The holes should be close together, but not touching. If they are, you may have to enlarge one of them by using a Dremel tool or sandpaper.
Fasten the pipe into place with metal clamps or screw connectors, making sure that it’s tight against the wall and level. Use plumbers’ putty or caulk to fill any gaps between the wall and pipe if necessary
Conclusion
Take care while working in your new home — avoid damaging anything and remember to wear protective gear whenever possible. Thanks for reading!


