On the memory of your cell, you have a lot of files, and you are afraid of running out of space sooner or later. You would like to move the photos, videos, and any other data that you do not need to have on your cell in the hard disk of your computer. But there is a problem: your computer does not recognize the iPhone.
Then don’t worry, because you’ve come to the right place to solve your problem. In this guide, I will show you how to transfer files from cell to PC, recommending some methods to synchronize the two devices with the use of official and third-party applications.
1Transfer iPhone files to PC with IOTransfer
It is a practical and convenient way to move the iPhone file to a PC with the user-friendly iPhone transfer software – IOTransfer. With a single click, you can move data, including photos, videos, music, and contacts from your iPhone to your PC, and vice verse.
Step 1: Connect the cell to the PC.
Install and start IOTransfer, connect the iPhone to the PC over a USB cable, and wait until the device is detected. If you see the notification “trust this computer”, click “trust” to continue.
Step 2: Select the files and move them to the PC.
On the home screen, you will see the file tablet. Select the photos, music or other files, and then click “transfer to PC” to move all data to the PC.
2Transfer files from iPhone to PC with iTunes
iTunes is the official program provided by Apple to manage cell data from PC and Mac. The limits of iTunes are known to all, it is no coincidence that more and more users are looking for alternative software solutions to iTunes, as is IOTransfer has seen in the previous point.
In any case, even with iTunes, you can move files from cell to PC in the form of backup, and therefore not selectively. To make this “massive” transfer here are the steps to follow:
- Download iTunes and then install and open it.
- Connect your iPhone to the computer with a USB cable.
- Click on the name of your iPhone, and in the “Summary” tab, click on “Backup now.”
- After finishing the backup process, your files on iPhone will have been transferred and saved on your computer.
The disadvantage of using iTunes is that it does not provide an easy way to selectively move data from cell to PC and from PC to iPhone. With iTunes, there is the concept of “synchronization” of data, but with this operation, you often go to delete data from the iPhone, so you have to be very careful!
3Transfer files from iPhone to PC with iCloud

Even with iCloud, it is possible to move files from iPhone to PC, but it is not possible to do the reverse operation such as copy folders from PC to iPhone. Here’s how to transfer data from iPhone to PC with iCloud:
Step 1: Log into iCloud.com and enter your Apple ID and password to log in.
Step 2: Click on the type of folder you want to export. You can choose between Email, Contacts, Calendar, Photos, Notes, etc.
Step 3: Export the data to the PC.
For example, by choosing “Photos” you can preview all the photos. Select the picture to be moved to the PC and click on the download symbol at the top right to download the photo to the PC.
The disadvantage of this method is that if there are many folders to be transferred, you will have to waste a lot of time because the operation must be done one at a time!
4Transfer files from iPhone to Mac with AirDrop
AirDrop is the native app that Apple has created to allow its users to quickly and easily move any folder from cell to Mac. For the passage of data (photos, videos, music, documents, etc.), it is you must first activate AirDrop on both cell and Mac.
Swipe from top to bottom and tap on the AirDrop icon o the iPhone; on the computer, instead, you must click on the item Go positioned in the top bar and, in the drop-down menu that opens, select the AirDrop function.
The second step is to activate Wi-Fi and Bluetooth on both. From the cell, press the icons corresponding to the Wi-Fi signal and Bluetooth. On the computer, the operation is even simpler – both are deactivated. The AirDrop window shows a button to click on to activation of both Wi-Fi and Bluetooth.
At this point, with your cell you select the image or document you want to move to the Mac, then tap on the sharing icon (a square with the arrow pointing upwards) and choose the device that results associated with AirDrop.
At the same time, a warning will appear on the Mac asking whether or not to accept the file. You then press the Accept button to complete the transfer. The received data will be stored in the Downloads folder.
5Transfer files from iPhone to PC or Mac with AirDroid
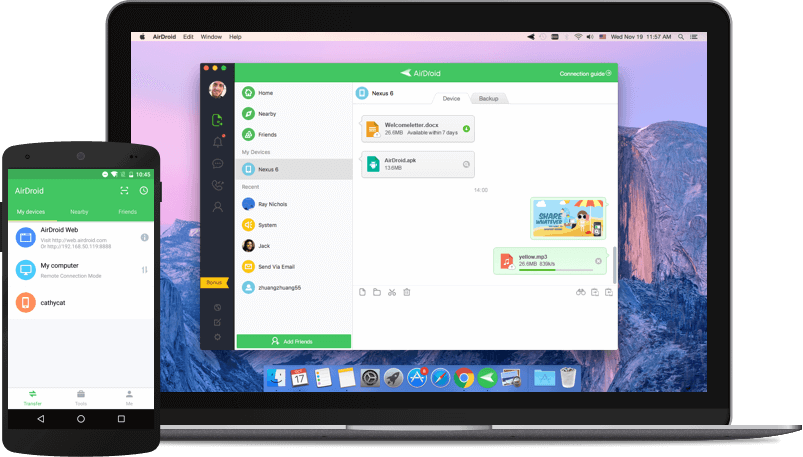
AirDroid is an application available for iOS that allows you to pass data from cell to PC without iTunes for free via the Wi-Fi network. The operation is the same both on Mac and on computers with Windows operating system.
First, you need to download the AirDroid app from the App Store, then complete the registration procedure. Once this is done, via the Mac or PC with Windows, you can connect to the official AirDroid Web site.
Then retake the cell and select the My devices item, then tap on the AirDroid Web option and activate the Scan QR Code function. Now it is sufficient to frame the QR Code with your cell. Start the automatic synchronization of all the files contained in the cell.
Finally, through the AirDroid Web interface from the desktop, click on the File, Photo or Video icon(depending on the type of file you want to transfer), then select the documents to be transferred and complete the operation by clicking on the button Download.


